The Evening Skincare Routine that Brought Me Out of my Burnout Funk
And now I never skip a night!

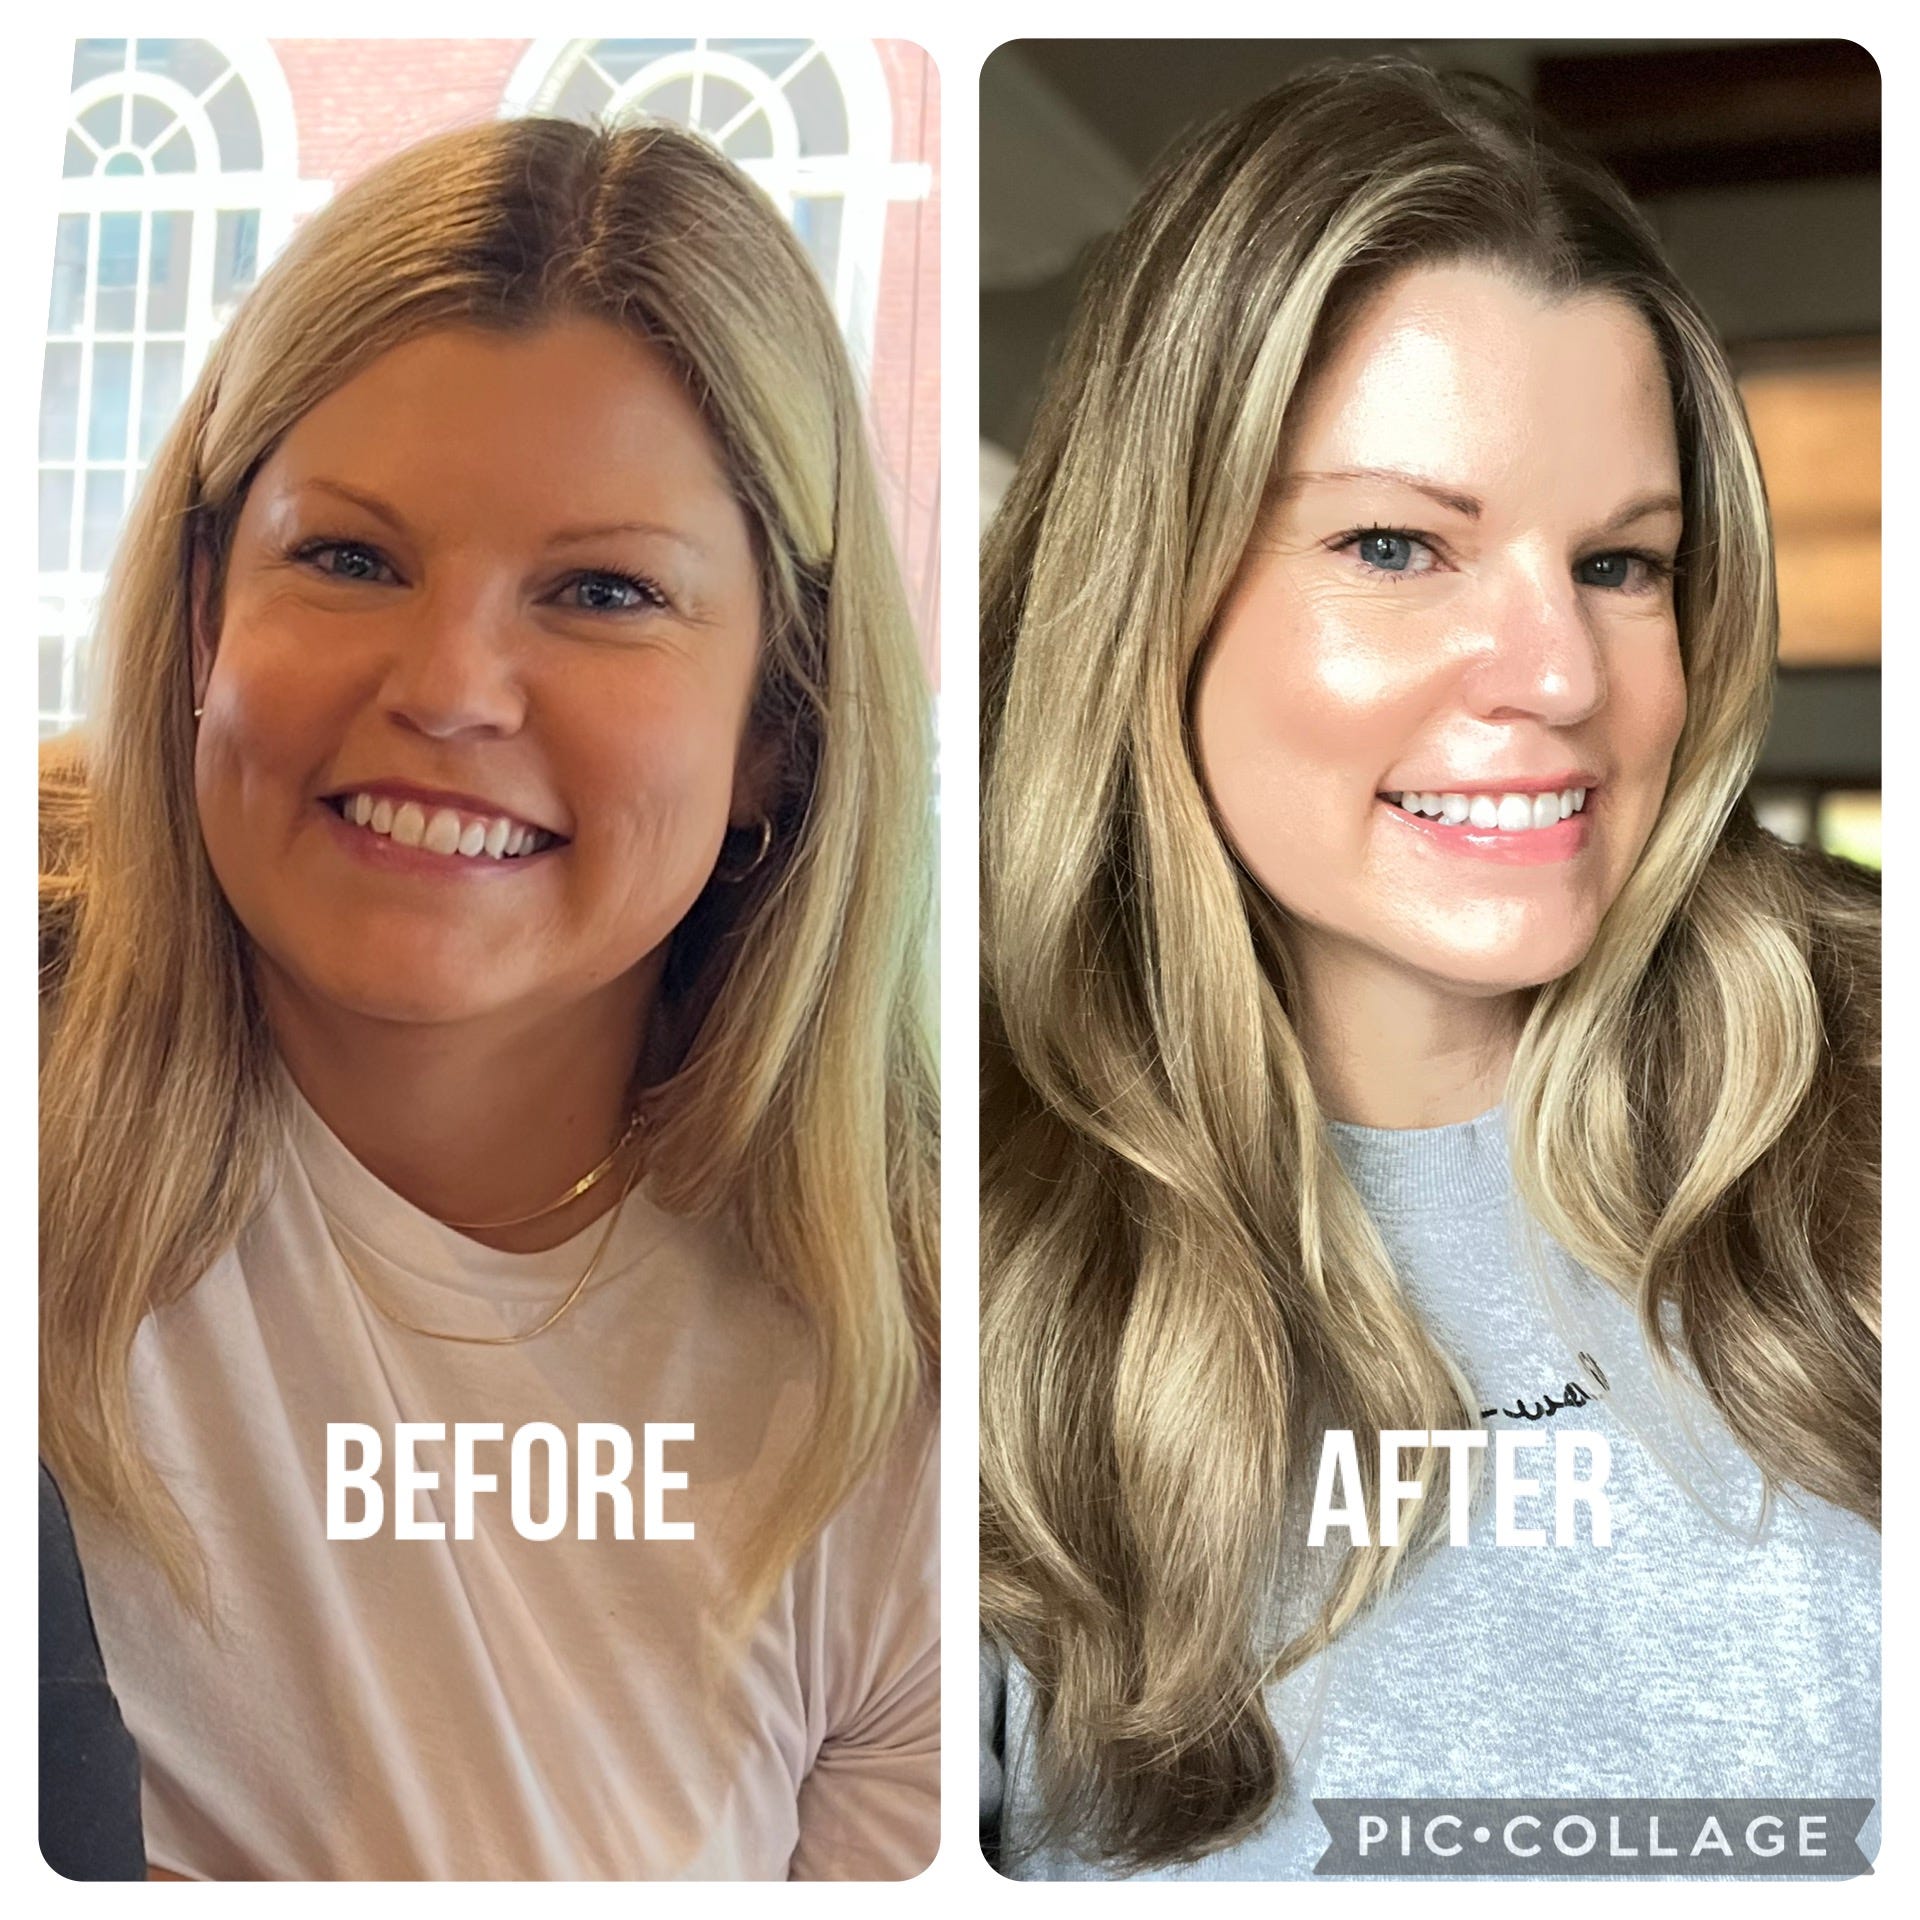
After establishing a morning skincare routine that I loved and could complete with consistency, I started working on a plan to implement an evening skincare routine that I loved and could complete with consistency. It sounds ridiculous to say that I had to work on a “plan” to do that, but it’s the truth. Because I was insanely inconsistent with my evening skincare in the throes of my Burnout Days. Because I was a high-functioning Burner, I could get up on time each day, get dressed, put on makeup, do my hair, look presentable, do my job well, smile and have fun, and no one suspected I was in misery. When I got home each day, I realize now that my system was just desperate to chill the heck out, and any effort to consistently stick to any sort of routine was just … impossible. In an attempt to regulate my nervous system, but with no skills or knowledge on how to do so or even recognize that I was dysregulated, my “routine” consisted of different ways to numb out. I would eat almost a whole bag of chips in one sitting and not taste a single one. I would scroll mindlessly on my phone and not connect with a single post. I would try to watch a show and get bored halfway through. I would drink a glass of wine that turned into two or three glasses of wine, especially on Fridays. And then any semblance of a skincare routine would just be too exhausting to try to do. Multi-steps? Forget it. I was lucky to get in some half-hearted cleansing while in the shower followed by some moisturizer when I got out. I didn’t want to spend time doing it. I was exhausted. And I didn’t want to look at myself in the mirror. I’m choking up just typing that. But again, it’s the truth. Because looking in the mirror at myself would mean that I had to face facts that something wasn’t right, and I just couldn’t deal with it.
Once regulated and out of the Burnout Zone (which only came, by the way, with a job change and a huuuuge act of hormone-balancing), I at least had the desire to begin a consistent evening skincare routine. I was so proud of myself!
So I researched and became my own lab rat and now finally have a really great multi-step routine that I stick to religiously. I truly never miss a night, which is a huge accomplishment in healing for me. What’s so funny about this routine is that it turned into exactly what I needed during my Burnout Days: time with myself, by myself, taking care of myself, and enjoying the process. During my routine, I’ll put on a soothing playlist, or listen to a podcast, crank up the essential oils diffuser, and just take. my. time. Now, I truly enjoy hanging out with me.
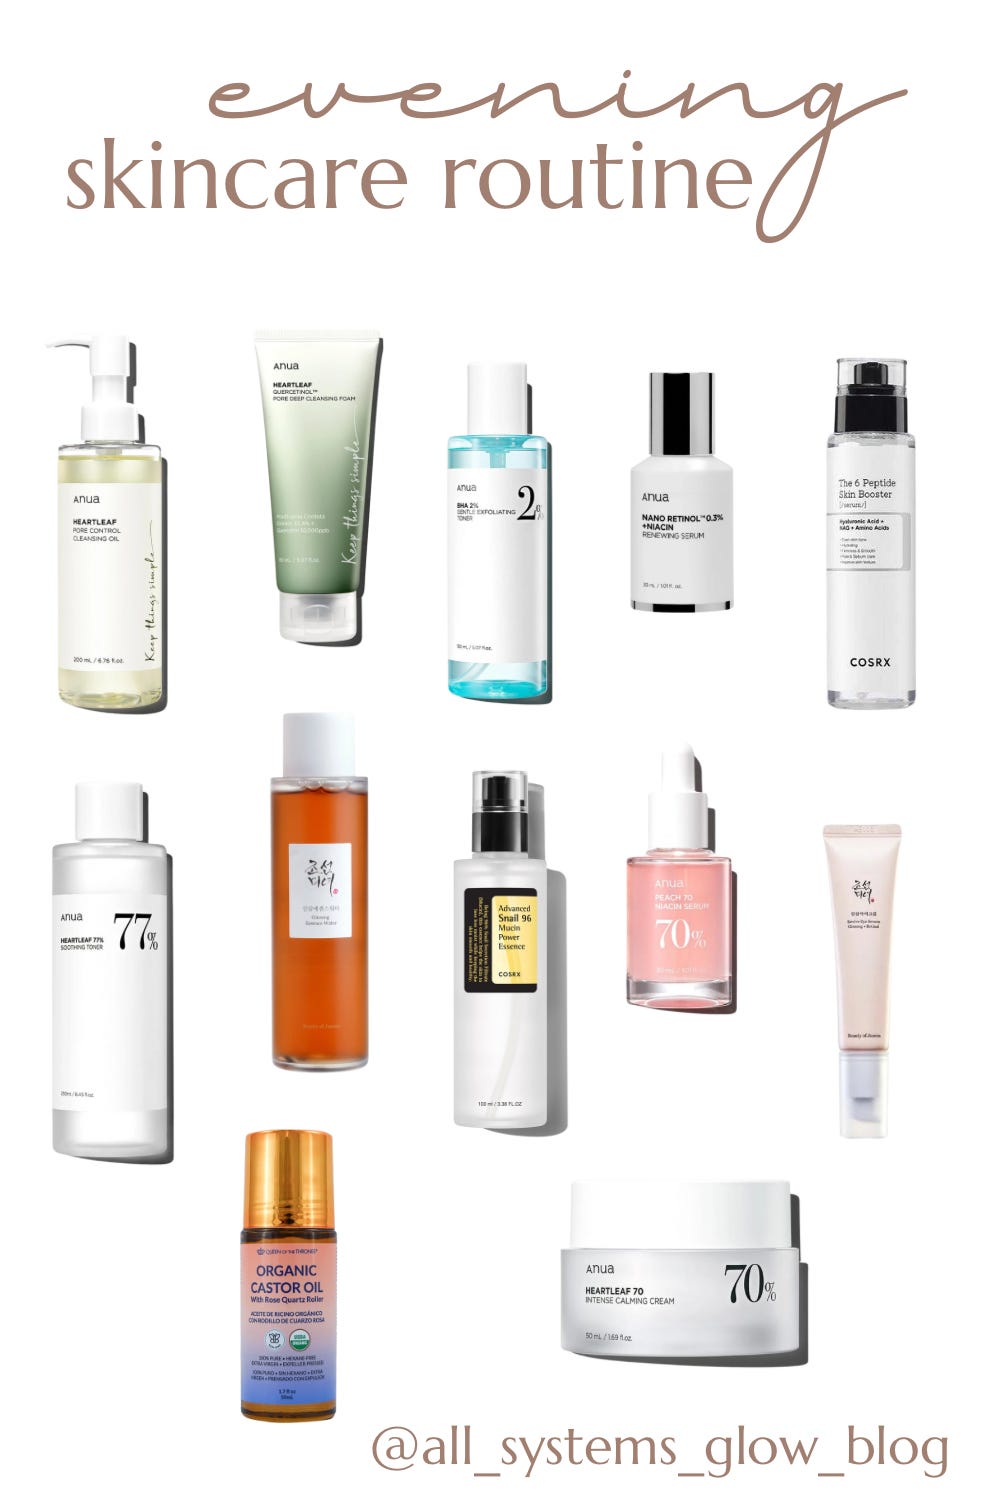
Here’s my current routine:
Please note: as an Amazon Affiliate, I earn from qualifying purchases.
Step 0: Set the mood.
Give yourself some great lighting, put on comfy clothes, turn on something to listen to, and let some spa-like essential oils fill the air.
Step 1: Double cleanse.
I like to start with an oil-based cleanser to loosen up the day’s products, sunscreen, makeup, and whatever else may be lingering on my skin’s surface. I start with a pump of the Anua Heartleaf Pore Control Cleansing Oil, work it into my skin, and then add a bit of water to emulsify the oil into a milky texture, then rinse.
Then, I use a pea-sized amount of the Anua Heartleaf Quercetinol Pore Deep Cleansing Foam to get super squeaky-clean. I spend about one whole minute massaging this cleansing foam into my skin, making sure to cover every millimeter of my face, focusing around areas that tend to gather product over time, like around the eyebrows, hairline, nose, and mouth.
For those who do not double cleanse, I have to tell you, the act of double-cleansing made a tremendous difference in my skin. I highly, highly recommend it. Before I did this, I never fully got all of my product and makeup off, and the rest of my skincare products just didn’t penetrate as deeply and therefore did not work very effectively. It’s really necessary.
Step 2: Exfoliate with a Liquid Exfoliating Toner (on non-Retinol nights) OR Apply Retinol (on non-exfoliating nights).
I added in this exfoliation step when I saw such great results using it in my morning skincare routine. I use the Anua BHA 2% Gentle Exfoliating Toner, and it’s just not recommended to use BHA toners at the same time as Retinol, so I alternate exfoliating nights and Retinol nights, like a modified version of skin-cycling.
On Retinol nights, instead of exfoliating, I will apply Retinol as my Step 2. I like the Anua Nano-Retinol 0.3% + Niacin Renewing Serum for Retinol nights, as it is extremely gentle. I’ve had no peeling or drying out from this formula; it’s been wonderful. You will want to let the Retinol dry for a few minutes before moving on to the next step. While my Retinol dries down, I like to swish mouthwash and brush my teeth, and by the time I’m finished with that, I’m ready for Step 3.
Step 3: Apply Peptides.
As I mentioned in my morning skincare post, peptides have an incredible amount of benefits including: antioxidant properties that protect your skin from environmental stressors like pollution and sun damage, collagen and elastin promotion that help minimize fine lines and wrinkles, skin barrier strengthening to help prevent weakening and damage in the future, redness and inflammation reduction, hydration improvement, and breakout prevention. So it’s really a no-brainer to include this step in both morning and evening routines.
The COSRX 6 Peptide Skin Booster is my favorite product for this step. It includes peptides to target: collagen boosting and plumping, retexturizing, excess sebum and pore care, brightening, reducing skin sensitivity, and fine line smoothing and firmness.
Step 4: Apply Toner.
I love a good toner! They help flood your face with hydration - something I desperately needed post-burnout, after drying up like a raisin.
My go-to daily toner is the Anua Heartleaf 77% Soothing Toner. It’s just the best and recently went viral for that reason. It hydrates, soothes, and calms, which is so perfect for an evening routine.
Step 5: Apply Ginseng Essence Water.
Just like in my morning routine, I apply the Beauty of Joseon Ginseng Essence Water as a luxurious optional next step. I will never not do it because there’s just something about this product that produces a lovely glow, and it may be because ginseng is known to improve blood flow and circulation. It’s just so good for the skin, too, with its antioxidant properties, it brightens and enhances skin texture, supports skin barrier function, and has anti-inflammatory properties. What a gem!
Step 6: Apply Essence.
As I previously mentioned, my skincare routines are highly influenced by the tenets of Korean Skincare. It’s important to me to have super clean beauty ingredients, without any harmful cancer-causers or endocrine-disruptors. After healing from the burnout and hormone disruption, I was taking no risks by using products that were known to cause issues. Korean Skincare is known for being clean, with gentle products that produce beautiful results. “Essence” is a Korean Skincare term that describes products that are like a toner-serum combo. The most well-known essence is probably snail mucin, which gained popularity in the U.S. a few years ago, and I became a fan. In fact, it was the first Korean product that I ever tried! Snail mucin is rich in humectants which help the skin retain moisture. It also contains peptides that promote collagen production and help reduce wrinkles, and has anti-inflammatory properties that can help reduce inflammation and treat breakouts.
My favorite snail mucin essence is the one we all know and love for glass skin: COSRX Snail Mucin 96%. If you’re not big on the idea of putting mucin from snails on your face, a good vegan substitute is bean essence. If you’re looking for a good one, I really like the Mixsoon Bean Essence.
Step 7: Apply Serum.
Once your face is all prepped from the products above, it allows serums to deeply penetrate and do their jobs. I like to use a brightening serum here, as I’m working on brightening my skin after years of sun damage and acne scarring in my teens.
My favorite brightening serum is the Anua Peach 70 Niacin Serum. First off, it smells wonderful. Secondly, niacinamide (the active ingredient in this serum) is used to help brighten the skin by reducing hyperpigmentation and dark spots and promoting radiance. I’m all in!
Step 8: Apply Eye Cream.
On Retinol-nights, I like to apply a Retinol-based eye cream, and my favorite is the Beauty of Joseon Revive Eye Serum Ginseng + Retinal. Retinal is a little different than Retinol. They are both derivatives of vitamin A, but Retinal is a bit more potent than Retinol. What’s important to know here is that Retinol or Retinal-based products make the skin sensitive to the sun, so I like to use this product for my nighttime eye cream, rather than my daytime eye cream.
On non-Retinol nights, I like to use castor oil as my eye cream. I could go on and on and on about the benefits of castor oil, but I will restrain myself and just say that it’s a really great option for an evening eye cream due to its antimicrobial and anti-inflammatory properties and ability to deeply penetrate the skin barrier. As a bonus, it has really made my eyelashes grow thicker and longer, better than any eyelash serum I’ve tried, with no terrible side effects like eye soreness or orbital fat loss. I would not recommend castor oil for a daytime eye cream because it’s thick, sticky, and shiny; not great for under makeup or general bopping around town. If you jump on the castor oil train, you must know that your castor oil absolutely must be cold- or expeller-pressed, hexane-free, and stored in a glass, amber bottle. Again, I could go on and on about why, but I will refrain and save that for another time. My favorite castor oil is the Queen of the Thrones Organic Golden Castor Oil.
Step 9: Apply Moisturizer.
There’s no better feeling that topping off your skincare steps with a luxuriously hydrating moisturizer to seal those products in so they can work while you snooze.
I like to use the Anua Heartleaf 70% Intense Calming Cream. It’s thick and lovely and sinks into your skin so nicely without being sticky. I also like to mix in some castor oil to this process, too, on most nights. With so many benefits, I always think it’s a good idea to add it in.
You may be wondering how long all of this takes. On average, I would say it takes, at max, twenty minutes. But even if it took forty-five minutes, or an hour, I would still do it every night without fail because of what this routine has meant for me, symbolically, as I’ve recovered from burnout. To be able to consistently spend time alone with myself, caring for myself, and celebrating my healing means everything to me, and I will never take that privilege for granted.
To your health,
- L